How to launch a drop
Turn a real place into an onchain campaign in about 5 minutes. You'll need a wallet and roughly 500,000 $DHOOD to unlock self-serve creation.
- An EVM wallet (Rainbow, MetaMask, WalletConnect…).
- Your own token already live on Robinhood Chain mainnet (launch it on a launchpad like Virtuals if you haven't).
- About 500,000 $DHOOD held in that wallet (the self-serve creator gate).
- A location for the pin — stand there with GPS, search the place, or drag the pin on the map.
- An on-site code in mind (the wizard can generate one) — gasless claims require it, and you display it at the venue.
From wallet to live campaign
Everything a project does to put an airdrop on the map.
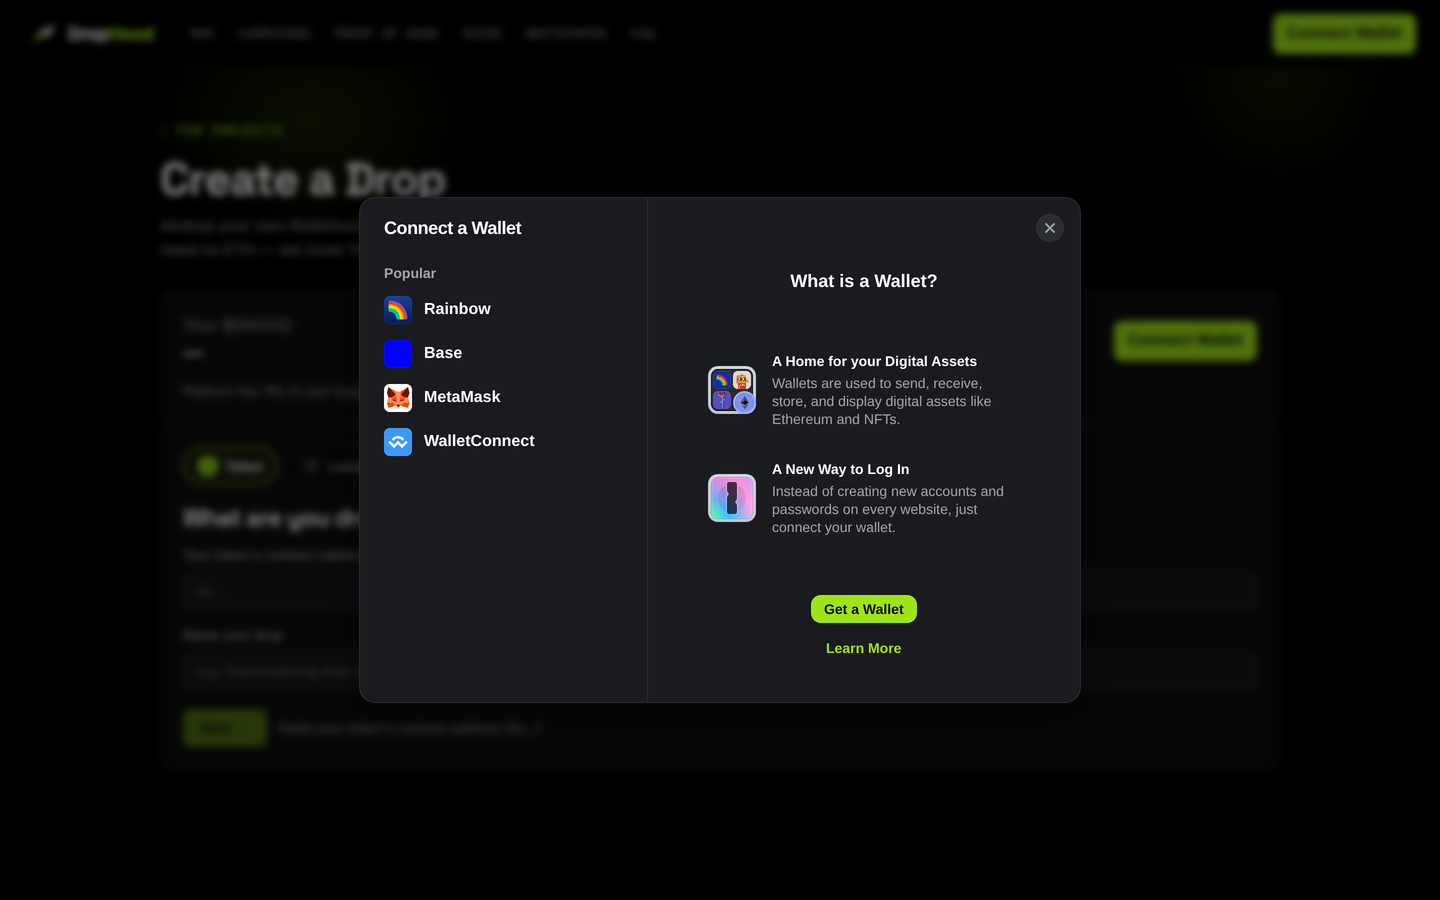
Connect your wallet
Open DropHood and hit Connect Wallet — Rainbow, MetaMask, WalletConnect, any EVM wallet works. No signup, no account.
Hold the creator gate
Running a self-serve drop needs about 500,000 $DHOOD in your wallet — an anti-spam gate. Grab it on Virtuals. The platform fee is a flat 1% of your budget, taken upfront in your own token — nothing else.

Pick your token
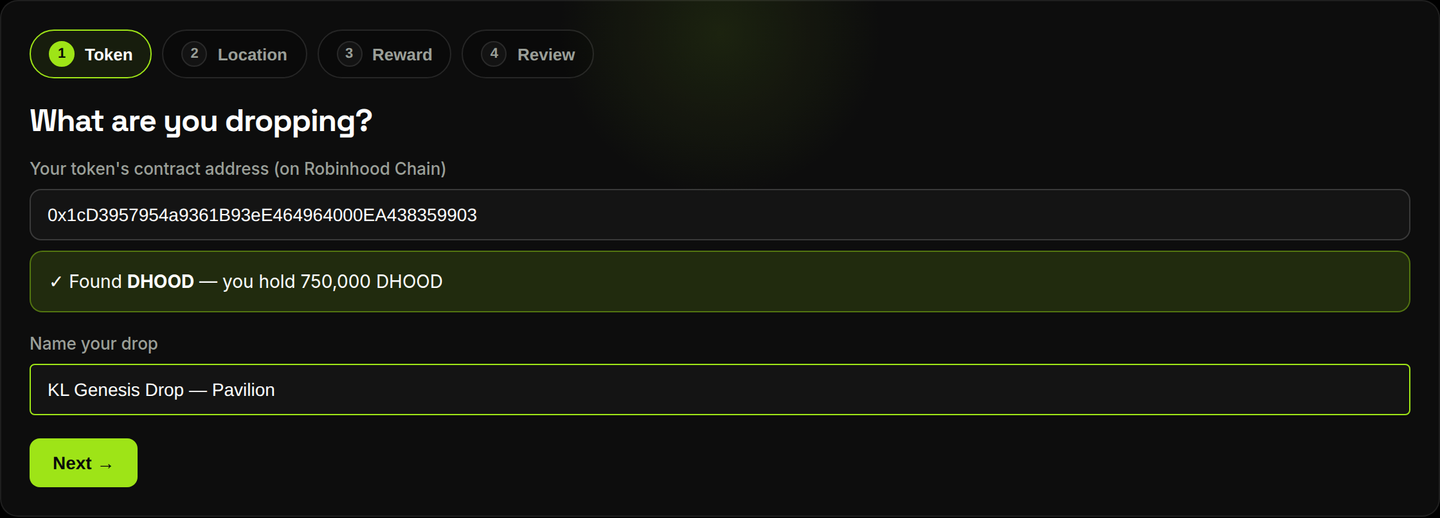
The creator is a 4-step wizard. Step one: paste your token's contract address — DropHood reads the symbol, decimals and your balance straight from the chain, so there's nothing else to type. Give the drop a name people will recognize.
Drop the pin
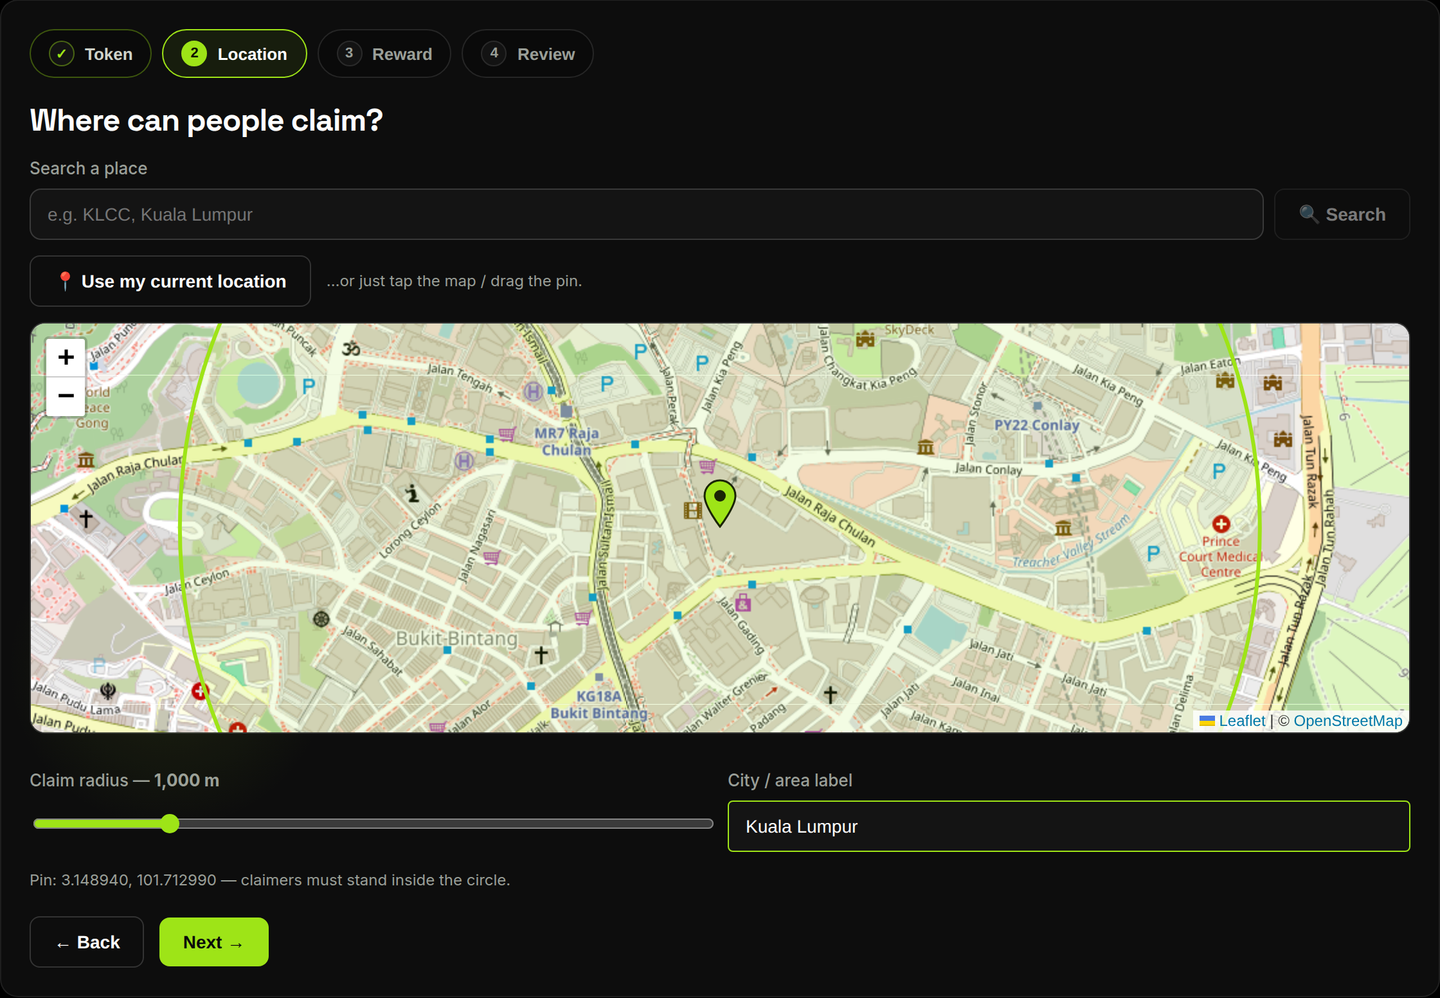
Search a place, tap “Use my current location”, or just drag the pin on the map. The circle shows exactly where claims will work — size it with the radius slider (50 m to 5 km). Only people standing inside it can claim.
Budget, schedule & the on-site code
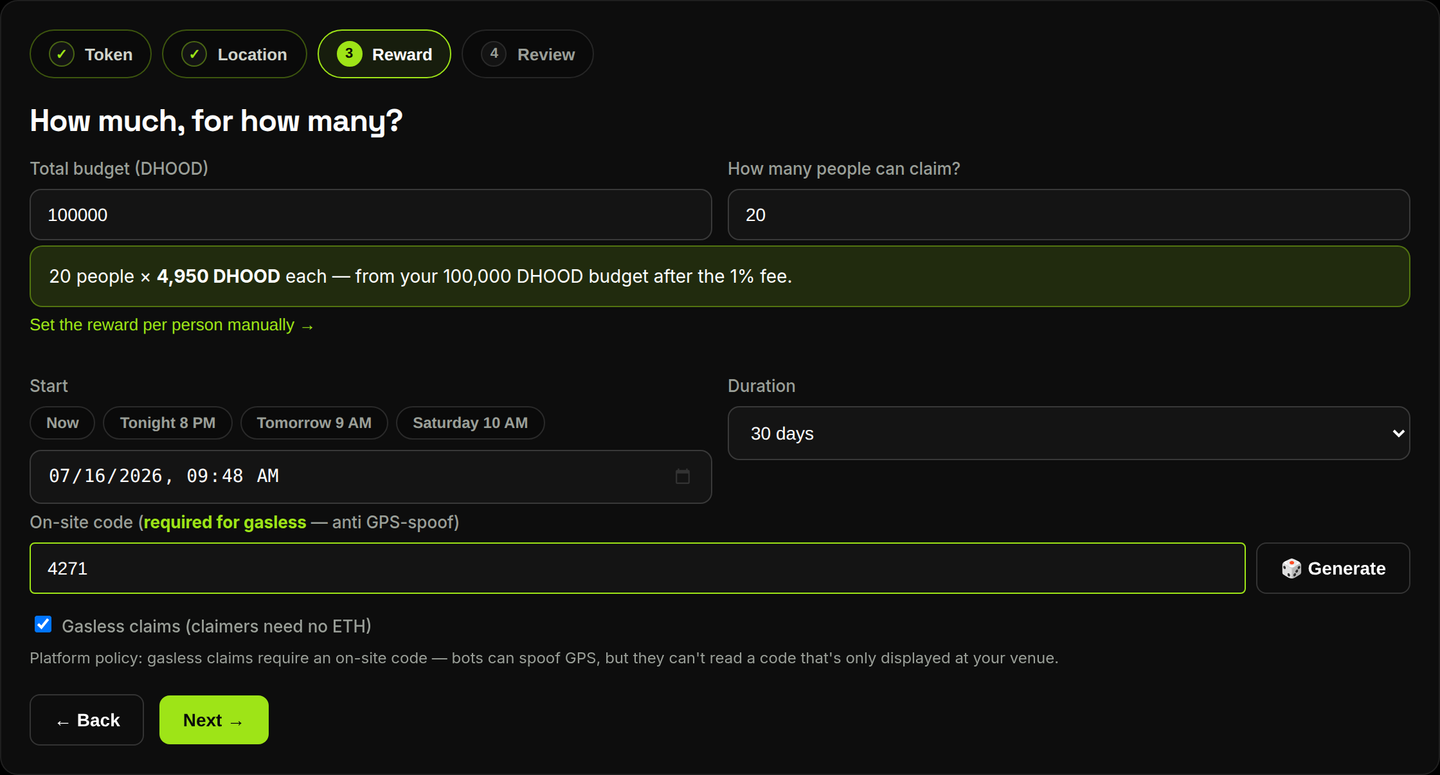
Enter your total budget and how many people can claim — DropHood does the math and shows the reward each person gets after the flat 1% platform fee (no UnderFunded surprises). Pick a start time, then set an on-site code (or hit 🎲 Generate): gasless claims require one — bots can spoof GPS, but they can't read a code that's only displayed at your venue.
Review, launch & share
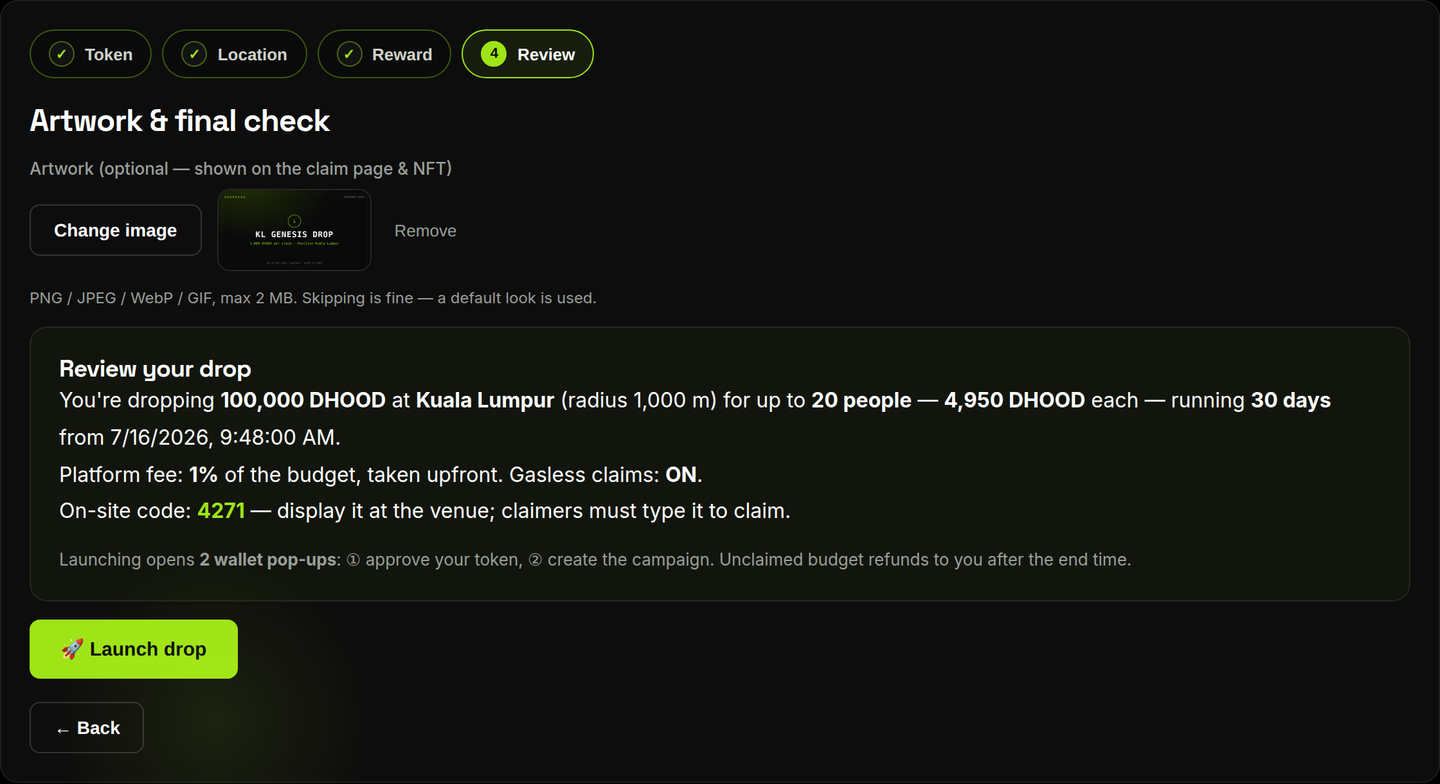
Optionally upload artwork (it becomes the drop's image on the claim page, the campaign card and social previews), read the plain-English review, and hit 🚀 Launch drop — two wallet confirmations: approve your token, create the campaign on-chain. You get a link like /claim/your-id with built-in share buttons for X, Telegram and WhatsApp. Display the on-site code at your venue and you're live.
What your participants experience
Simple enough for someone's first-ever onchain action.
Open the drop link
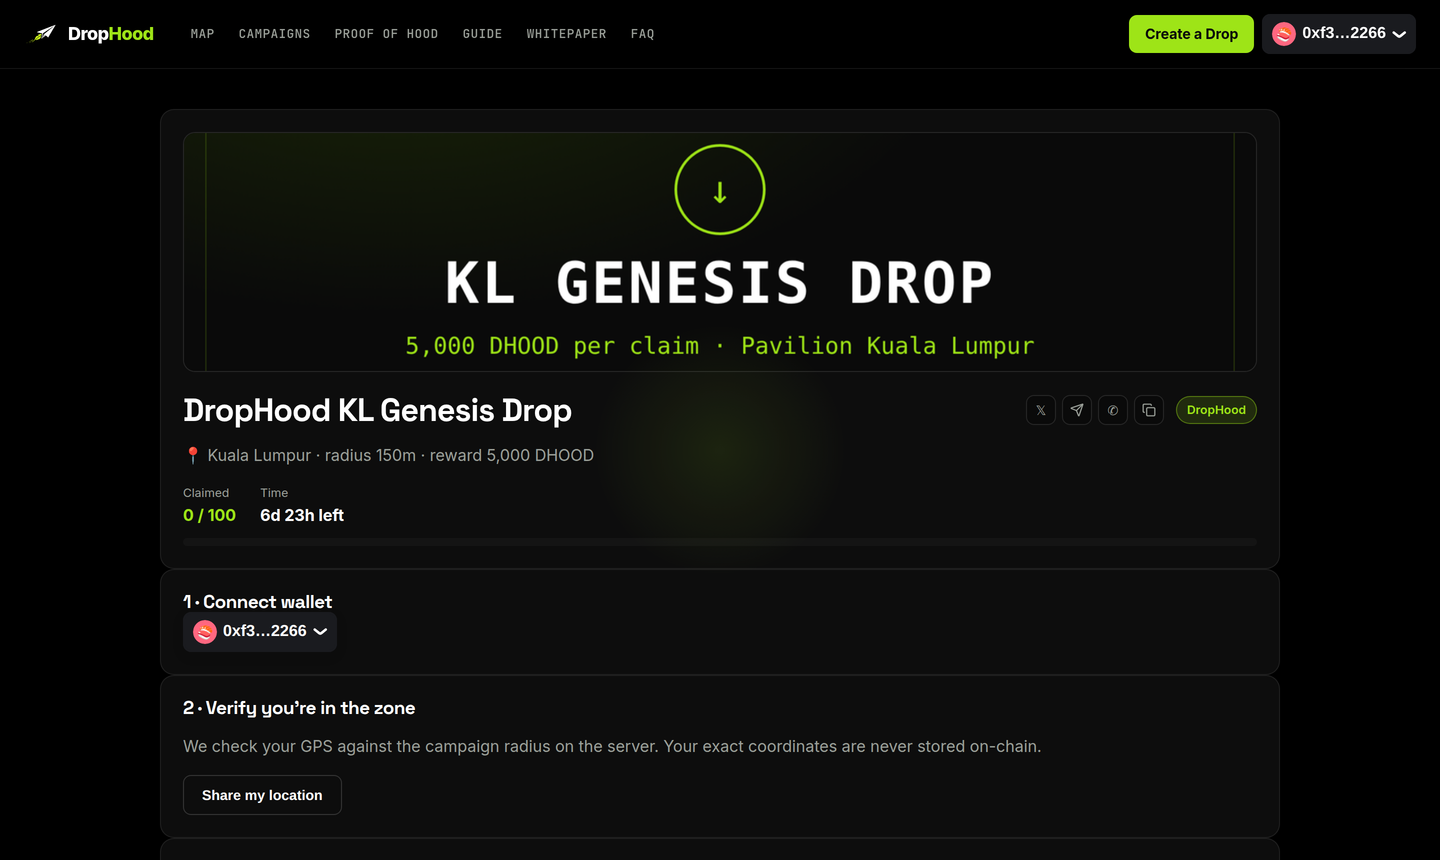
Anyone opens your /claim link and sees the artwork, the reward, how many are left, and the countdown — no app install, no complicated onboarding. Share buttons on the page let them spread it further.
Verify you're in the zone
They connect a wallet and tap “Share my location.” DropHood checks their GPS against your radius on the server — exact coordinates are never stored on-chain, only a salted hash. The public map only ever shows the approximate area.
Type the on-site code, claim gasless + mint Proof of Hood
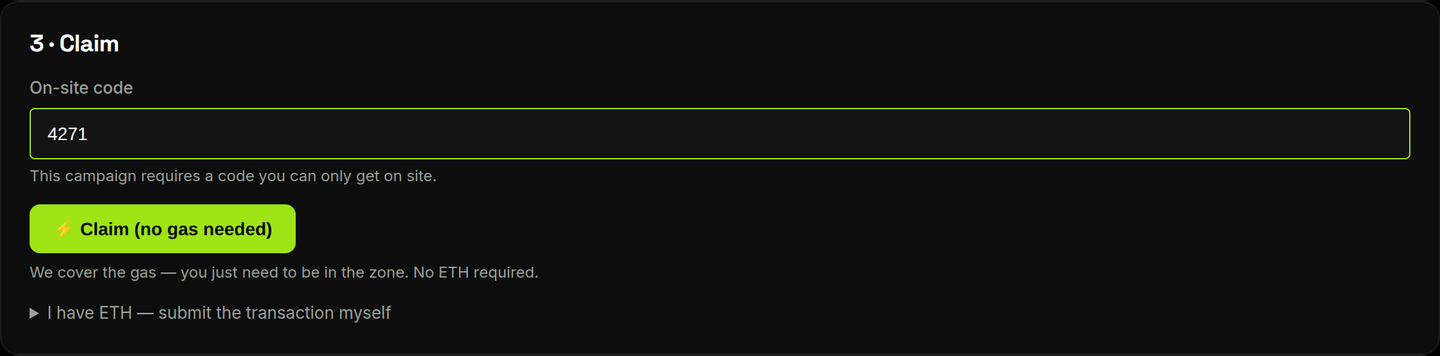
They type the on-site code you displayed at the venue — the proof they really showed up — and tap “Claim (no gas needed).” We sponsor the gas: the reward lands in their wallet and a Proof of Hood NFT is minted. No ETH required, ever. (Wallets holding ETH can also submit the claim themselves.)
Ready to run your first drop?
Pick a spot, set a reward, and bring real people onchain.